


- Katılım
- 1 Haz 2014
- Mesajlar
- 284
- Tepkime puanı
- 263
- Puanları
- 63
Configure VPN. Windows
I will make a reservation right away - VPN services are usually paid. You pay either for the used traffic, or for the time of use (day, week, month, year) of the service.
Below I will give a list of verified servers that do not exactly store information about you, are not located in the Russian Federation and accept payment in bitcoins.
1. Prices for anonymous VPN at Proxy.sh price from 2 dollars per month
2. Trusted Security Privacy and Anonymity Service Provider | BolehVPN - 10 dollars a month
3. IPredator - VPN - $ 8 per month
4. NordVPN: Best VPN Service Provider | # 1 Editors' Choice - 10 dollars a month
five. Mullvad - $ 8 per month
6. VPN Pricing - PPTP, SSTP, L2TP and OpenVPN Access: EarthVPN - 4 dollars a month
7. AirVPN - The air to breathe the real Internet - 10 dollars a month
8. blackVPN - Get The Premium VPN Service - 12 dollars a month
As an example, let's take VPN settings from NordVPN.
Windows
Using a ready-made client from a VPN service provider.
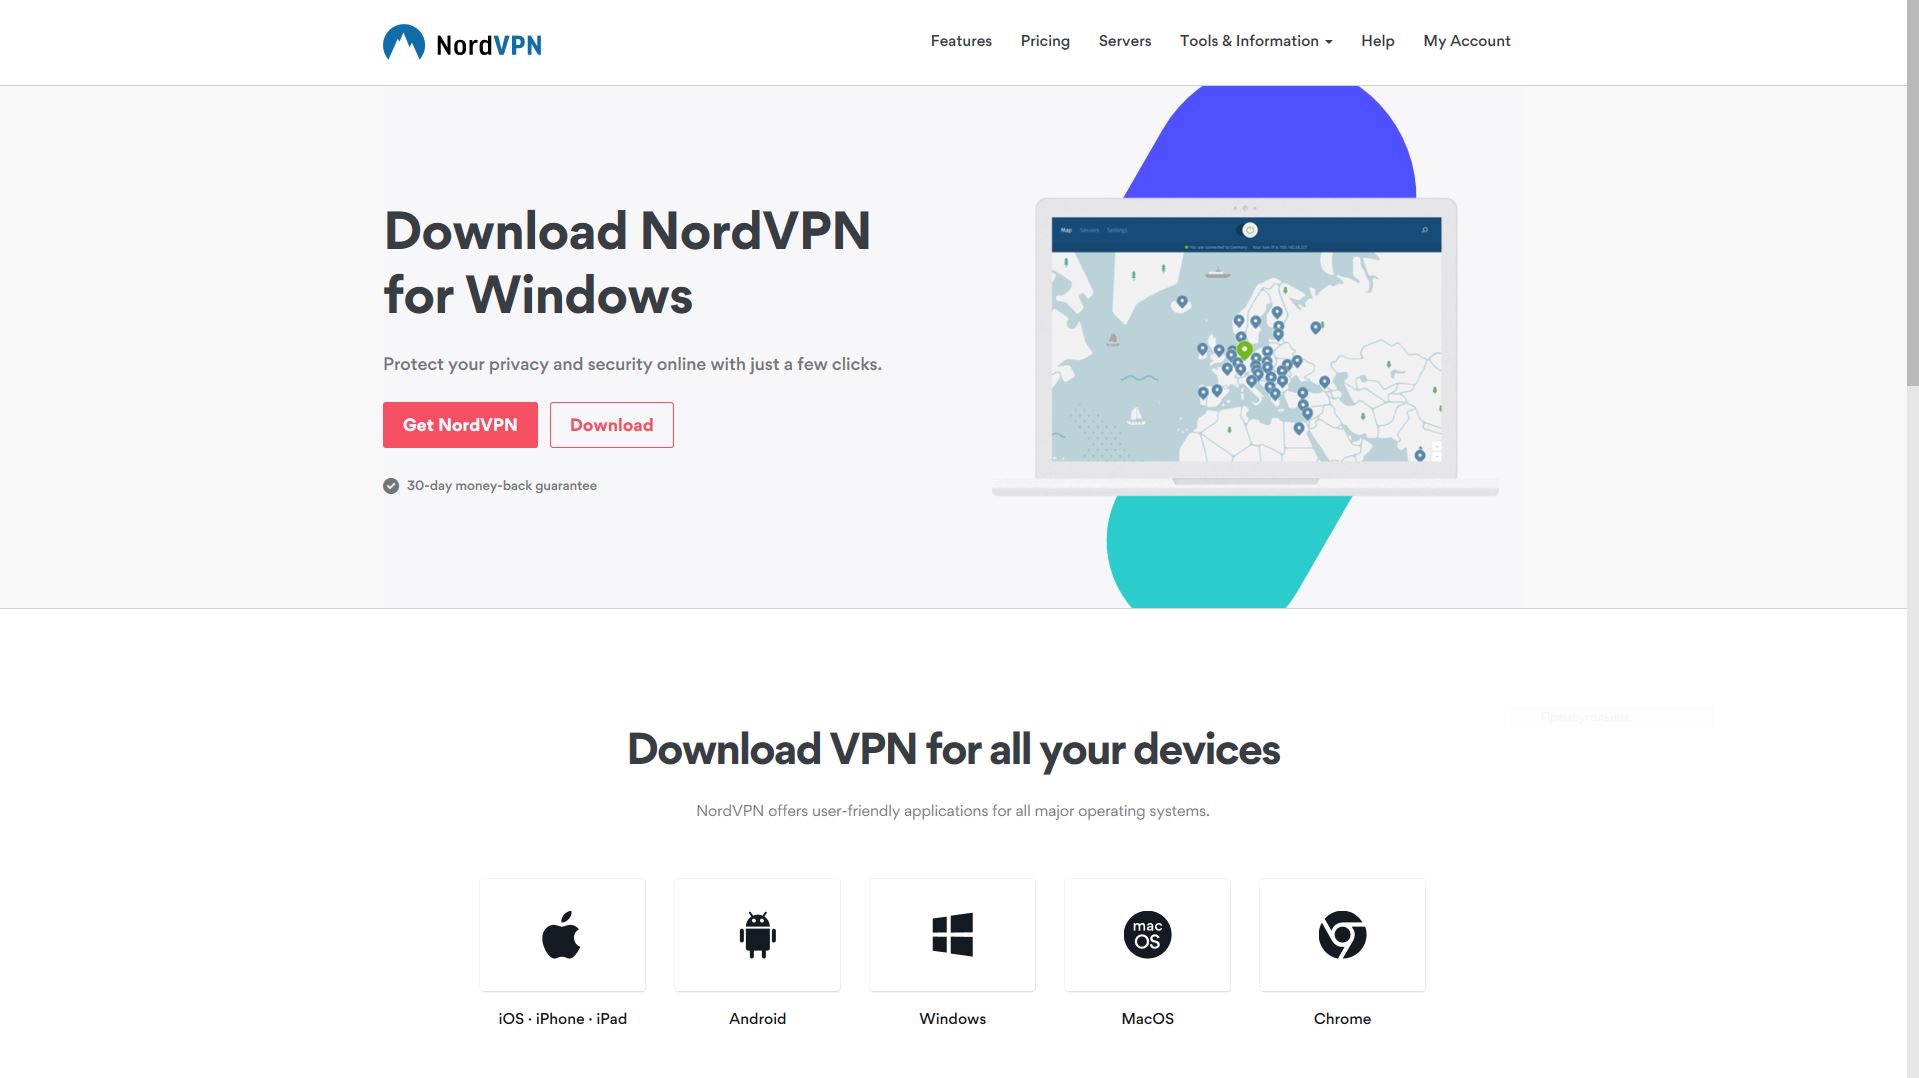
1) Download the client from the link: Download VPN Client: Simple to Set Up & Easy to Use Software! | NordVPN
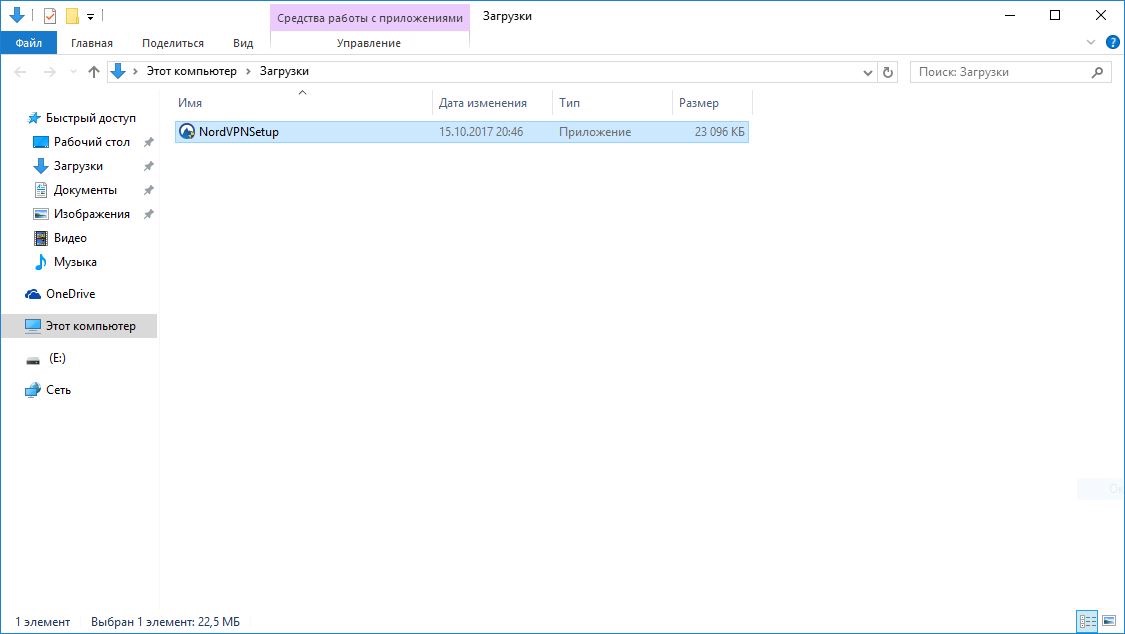
2) Open the downloaded file.
3) Confirm the program changes
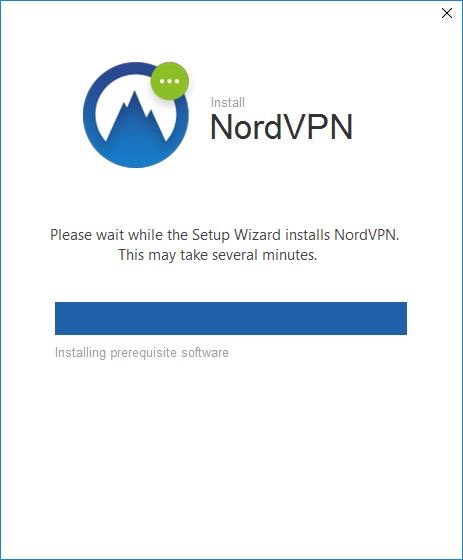
4) Install.
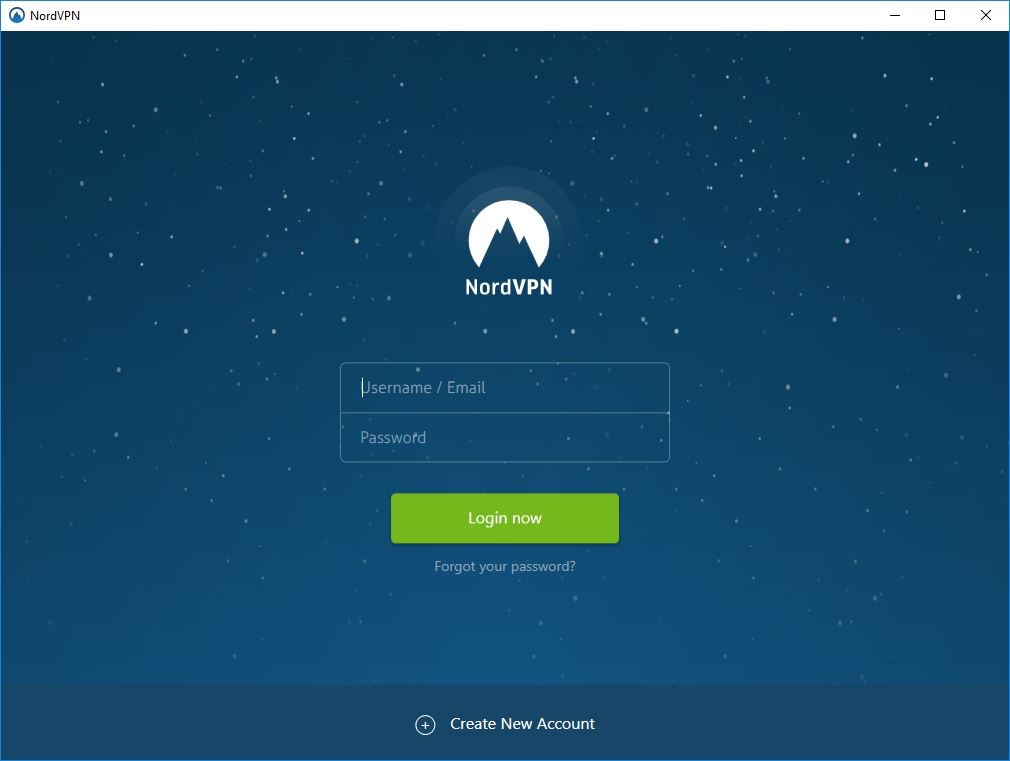
5) We use it.
VPN setup through OpenVPN:
1) Download the OpenVPN GUI client from the official site of the scammer: https://swupdate.openvpn.org/community/releases/openvpn-install-2.4.0-I602.exe
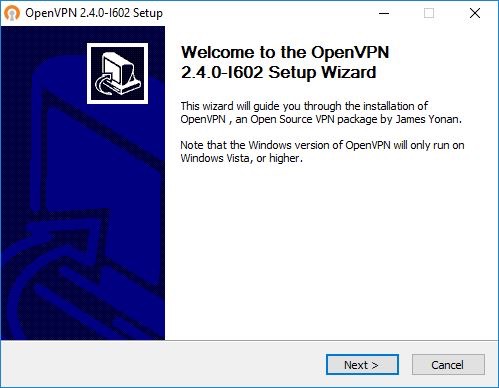
2) Install the downloaded file.
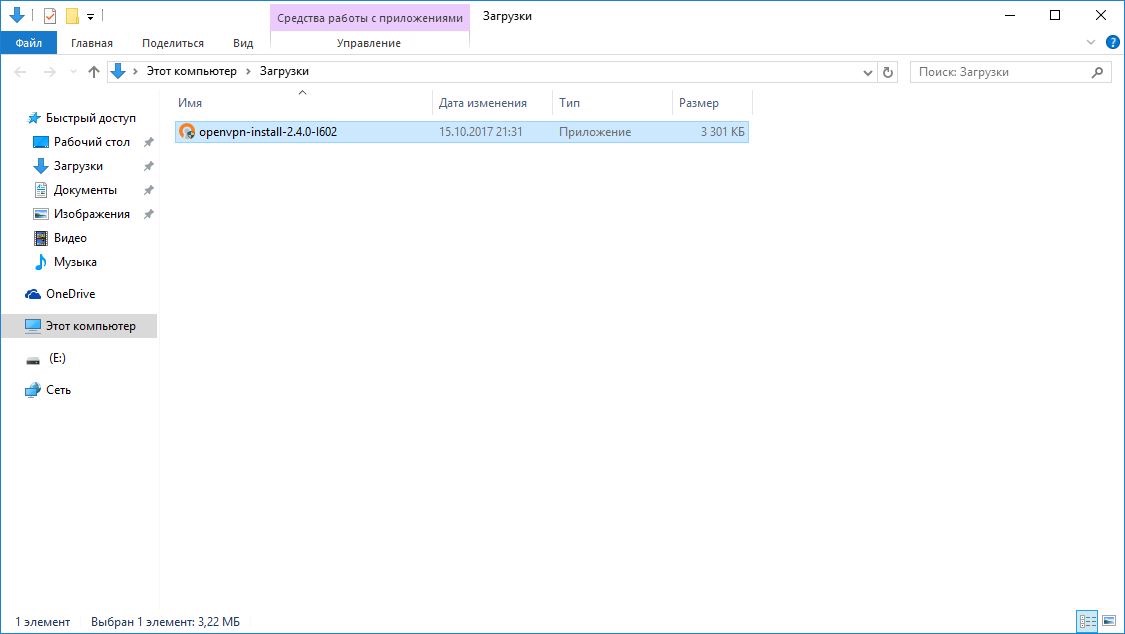
Follow the instructions of the installer.
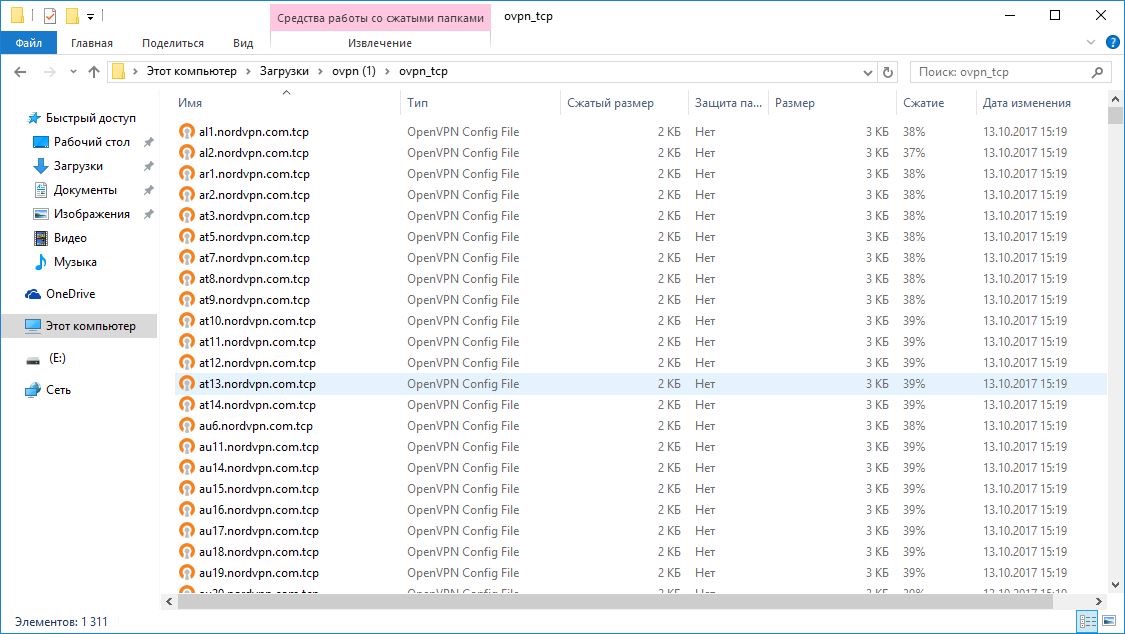
3) After you installed the program, you need to download the configuration files of the servers of your VPN provider (they can be found on the site of your VPN provider), in this example we use NordVPN.
4) The downloaded file will be a ZIP archive containing many configurations - each of which contains information about how to connect to one of the servers of your VPN provider, as well as the TCP / UDP connection protocol. I recommend using the TCP protocol, although it works slower than UDP, but it guarantees the delivery of data packets unchanged, sequence and without loss.
5) Now you need to extract the configurations that you will use in the folder: C: / Program Files / OpenVPN / config /
The OpenVPN GUI application only supports up to 50 configuration files present in the / config / folder. Since each file is a server, you need to know in advance which servers you want to connect to. After the installation is complete, you can easily switch between the servers that you copied.
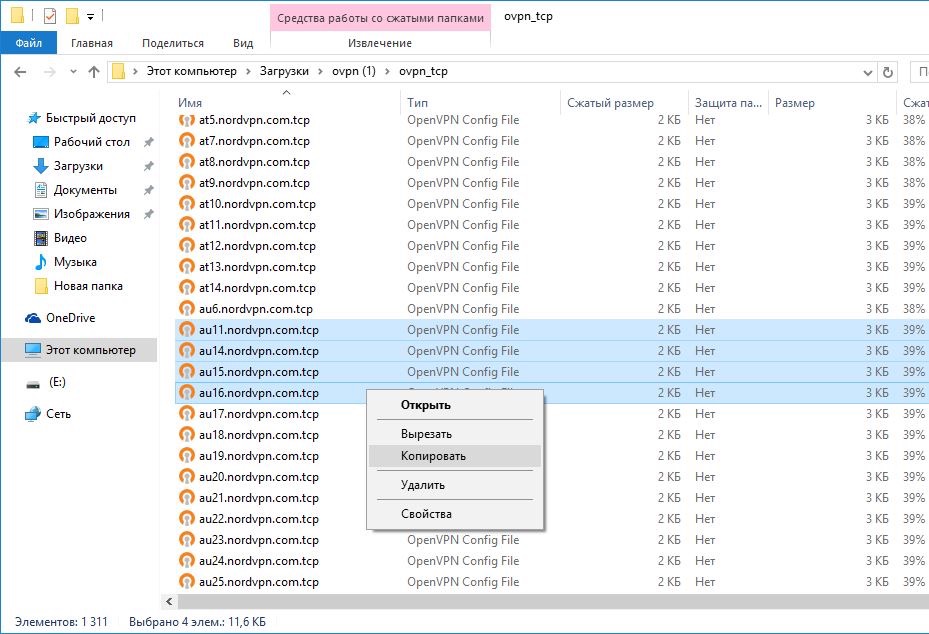
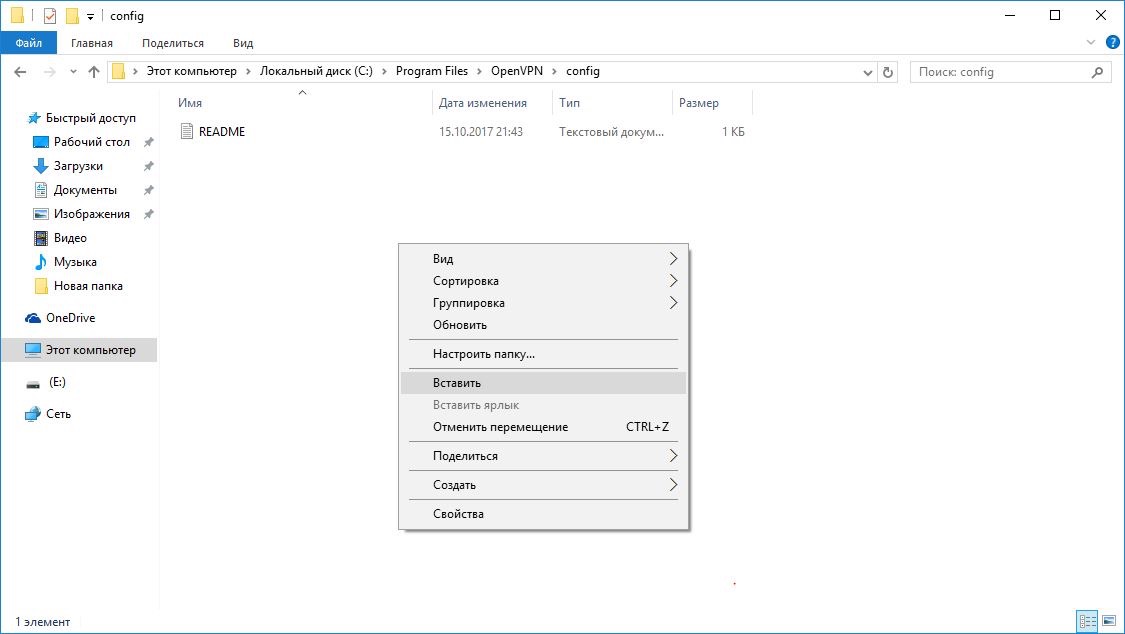
5.1) Open the ZIP archive with server configurations, which you download from the site of your VPN provider, then open C: / Program Files / OpenVPN / config /
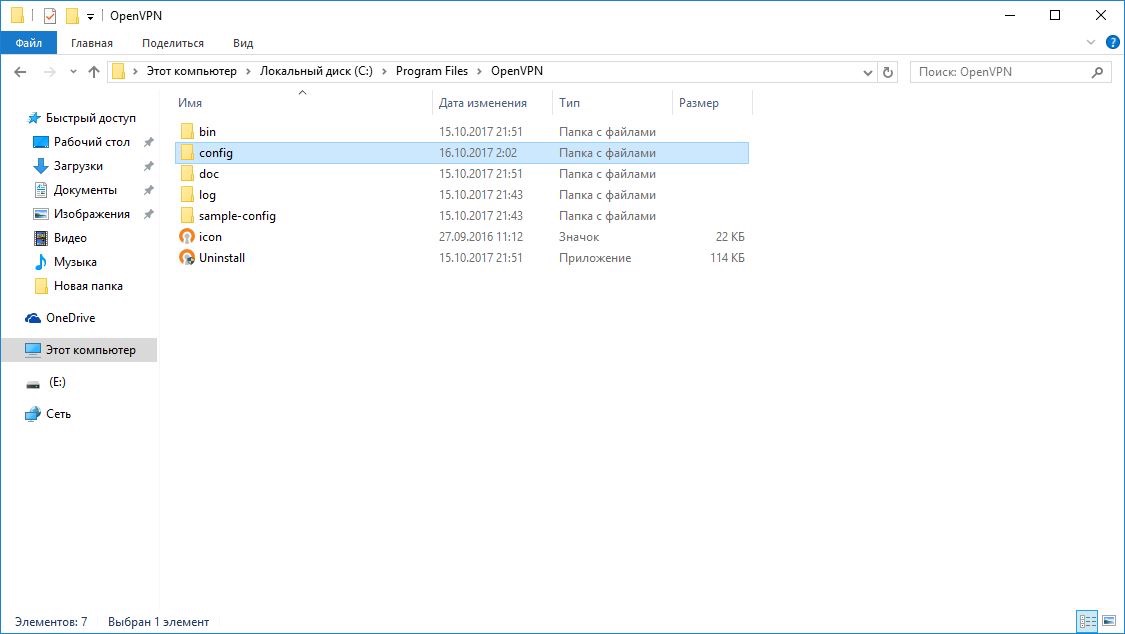
5.2) Now copy and paste the files.
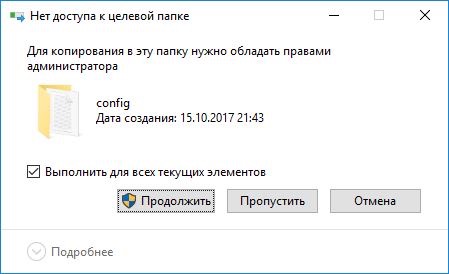
Click continue.
6) Now that the configuration files are loaded in the appropriate folder, let's open the OpenVPN GUI application.

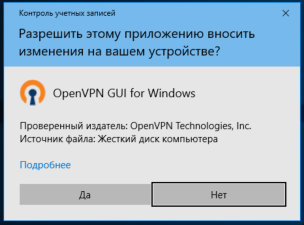
7) Allow the program to make changes - this is important for the VPN connection.
8) An icon with the program will be displayed in the lower right corner.

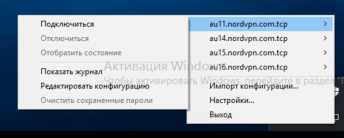
9) Right-click on the program icon, select one of the servers, click connect.
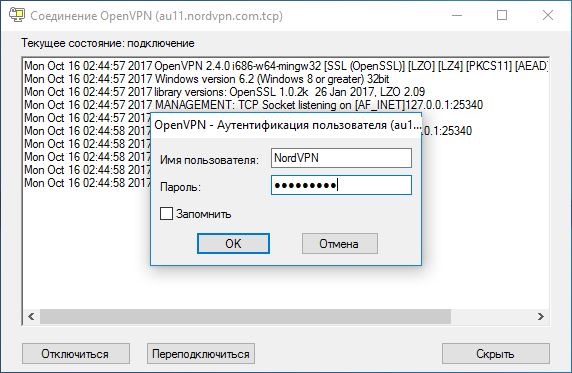
10) Enter your username / password that you created when registering with your VPN provider. Click OK.
11) Your VPN connection is configured, you are amazing!
Configure VPN over L2TP / IPSec:
Windows 10
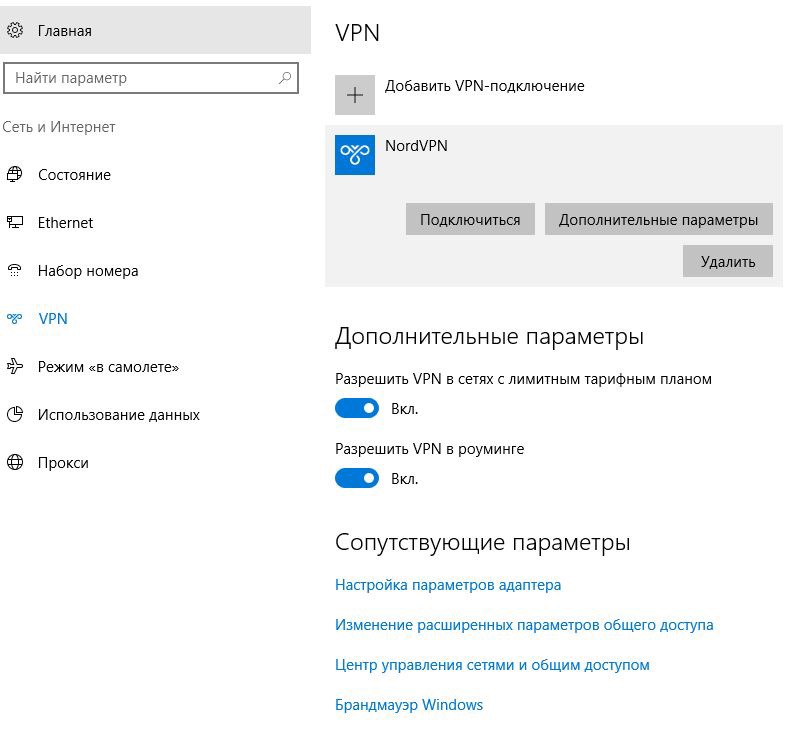
1) We do this way: Settings> Network and Internet> VPN and click "Add VPN Connection".

2) In the open window you will see the following (see image):
VPN service provider: select Windows (embedded)
Connection name: write whichever you like best
Server name or address: depending on the VPN provider (in our example, us333.nordvpn.com
VPN Type: L2TP / IPSec with Pre-Key
Shared key: Depends on your VPN provider, in this example nordvpn
Login Data Type: Username and Password
Username: Your username that you used to register with your VPN service provider, in this example NordVPN
Password: Accordingly, the password that you used during registration
3) Click on the newly created VPN connection, then on "Connect" and you are amazing!
Windows 7/8
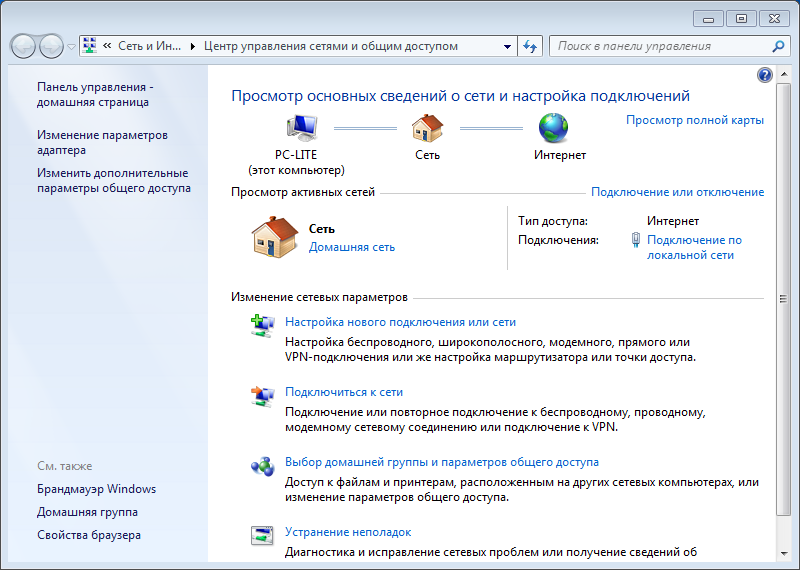
1) Open the Network and Sharing Center.
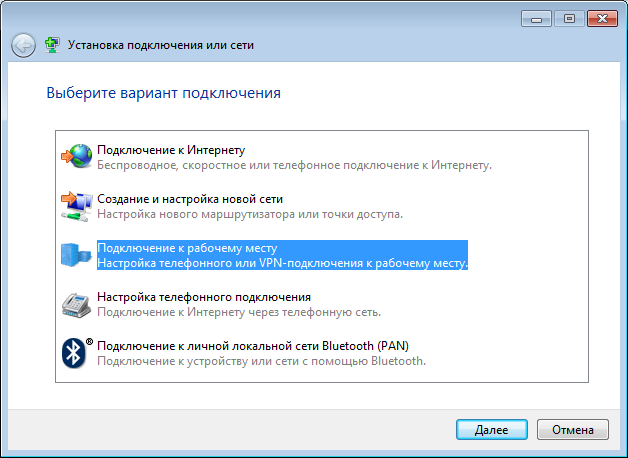
2) Click on Create and configure a new connection or network.
3) Then we click on Connect to the workplace.
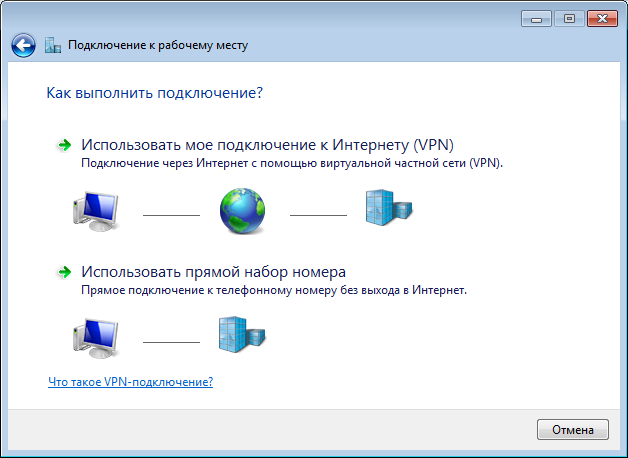
4) Click on Use my VPN Internet connection.
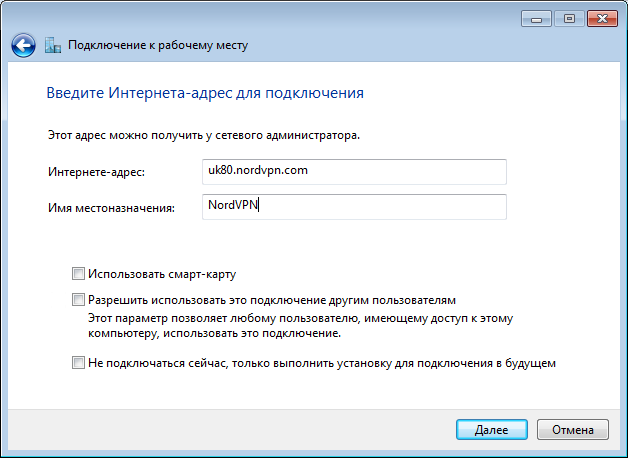
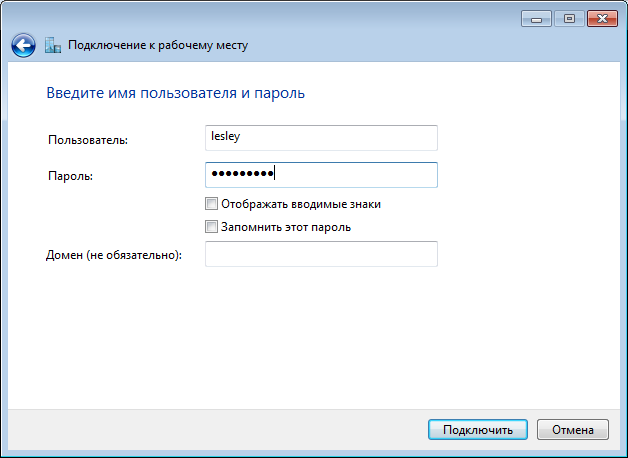
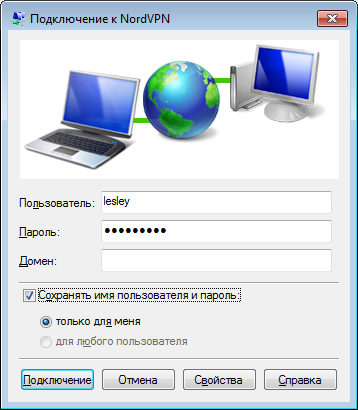
5) In the Internet Address field, enter the IP address of the server of your VPN provider (a list of IP addresses can be found on the website of your VPN provider). In the Name field of the destination, write the name of your VPN connection. Click Next. Enter the username / password that you created when registering with your VPN provider.
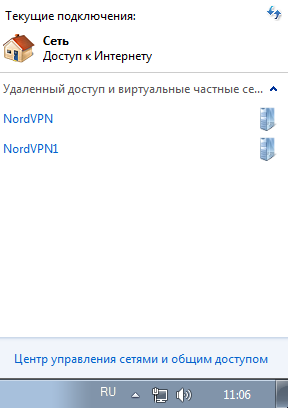
6) Next, in the lower right corner, click on Available Connections.

7) Right-click on the VPN connection icon, select Properties.
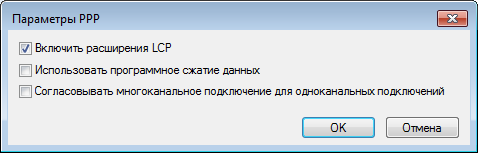
8) Make sure the Windows login domain is not turned on. Redial attempts must be set to a very large number. Click PPP Settings.

9) Within PPP settings, it is important to enable LCP extensions and disable software compression.
10) Go to the Security tab. Choosing a VPN Type: L2TP IPSec VPN.
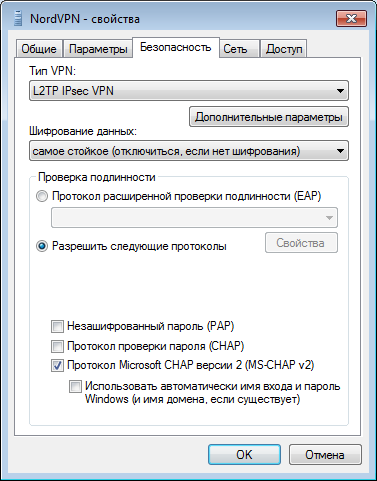
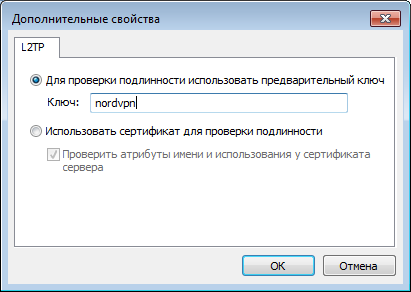
11) Click Advanced Options.
12) We select For authentication use a provisional key. Enter the key of your VPN provider.
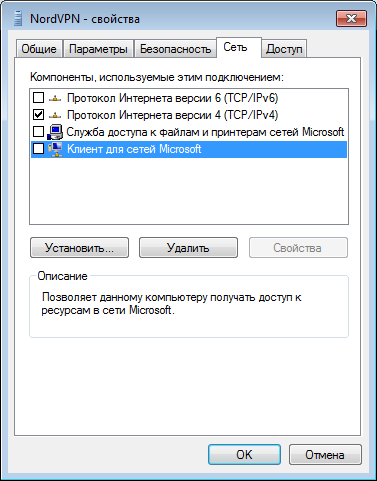
13) Go to the Network tab. Uncheck IPv6 from the list of available network protocols. Also uncheck the "File and Printer Sharing Service for Microsoft Networks" and the "Client for Microsoft Networks" check boxes from the list of used items and click "OK."
14) Now we return to Available Connections again. We click on the VPN connection, enter the username / password.
15) We use it!
(C) Lesley
I will make a reservation right away - VPN services are usually paid. You pay either for the used traffic, or for the time of use (day, week, month, year) of the service.
Below I will give a list of verified servers that do not exactly store information about you, are not located in the Russian Federation and accept payment in bitcoins.
1. Prices for anonymous VPN at Proxy.sh price from 2 dollars per month
2. Trusted Security Privacy and Anonymity Service Provider | BolehVPN - 10 dollars a month
3. IPredator - VPN - $ 8 per month
4. NordVPN: Best VPN Service Provider | # 1 Editors' Choice - 10 dollars a month
five. Mullvad - $ 8 per month
6. VPN Pricing - PPTP, SSTP, L2TP and OpenVPN Access: EarthVPN - 4 dollars a month
7. AirVPN - The air to breathe the real Internet - 10 dollars a month
8. blackVPN - Get The Premium VPN Service - 12 dollars a month
As an example, let's take VPN settings from NordVPN.
Windows
Using a ready-made client from a VPN service provider.
1) Download the client from the link: Download VPN Client: Simple to Set Up & Easy to Use Software! | NordVPN
2) Open the downloaded file.
3) Confirm the program changes
4) Install.
5) We use it.
VPN setup through OpenVPN:
1) Download the OpenVPN GUI client from the official site of the scammer: https://swupdate.openvpn.org/community/releases/openvpn-install-2.4.0-I602.exe
2) Install the downloaded file.
Follow the instructions of the installer.
3) After you installed the program, you need to download the configuration files of the servers of your VPN provider (they can be found on the site of your VPN provider), in this example we use NordVPN.
4) The downloaded file will be a ZIP archive containing many configurations - each of which contains information about how to connect to one of the servers of your VPN provider, as well as the TCP / UDP connection protocol. I recommend using the TCP protocol, although it works slower than UDP, but it guarantees the delivery of data packets unchanged, sequence and without loss.
5) Now you need to extract the configurations that you will use in the folder: C: / Program Files / OpenVPN / config /
The OpenVPN GUI application only supports up to 50 configuration files present in the / config / folder. Since each file is a server, you need to know in advance which servers you want to connect to. After the installation is complete, you can easily switch between the servers that you copied.
5.1) Open the ZIP archive with server configurations, which you download from the site of your VPN provider, then open C: / Program Files / OpenVPN / config /
5.2) Now copy and paste the files.
Click continue.
6) Now that the configuration files are loaded in the appropriate folder, let's open the OpenVPN GUI application.
7) Allow the program to make changes - this is important for the VPN connection.
8) An icon with the program will be displayed in the lower right corner.
9) Right-click on the program icon, select one of the servers, click connect.
10) Enter your username / password that you created when registering with your VPN provider. Click OK.
11) Your VPN connection is configured, you are amazing!
Configure VPN over L2TP / IPSec:
Windows 10
1) We do this way: Settings> Network and Internet> VPN and click "Add VPN Connection".
2) In the open window you will see the following (see image):
VPN service provider: select Windows (embedded)
Connection name: write whichever you like best
Server name or address: depending on the VPN provider (in our example, us333.nordvpn.com
VPN Type: L2TP / IPSec with Pre-Key
Shared key: Depends on your VPN provider, in this example nordvpn
Login Data Type: Username and Password
Username: Your username that you used to register with your VPN service provider, in this example NordVPN
Password: Accordingly, the password that you used during registration
3) Click on the newly created VPN connection, then on "Connect" and you are amazing!
Windows 7/8
1) Open the Network and Sharing Center.
2) Click on Create and configure a new connection or network.
3) Then we click on Connect to the workplace.
4) Click on Use my VPN Internet connection.
5) In the Internet Address field, enter the IP address of the server of your VPN provider (a list of IP addresses can be found on the website of your VPN provider). In the Name field of the destination, write the name of your VPN connection. Click Next. Enter the username / password that you created when registering with your VPN provider.
6) Next, in the lower right corner, click on Available Connections.
7) Right-click on the VPN connection icon, select Properties.
8) Make sure the Windows login domain is not turned on. Redial attempts must be set to a very large number. Click PPP Settings.
9) Within PPP settings, it is important to enable LCP extensions and disable software compression.
10) Go to the Security tab. Choosing a VPN Type: L2TP IPSec VPN.
11) Click Advanced Options.
12) We select For authentication use a provisional key. Enter the key of your VPN provider.
13) Go to the Network tab. Uncheck IPv6 from the list of available network protocols. Also uncheck the "File and Printer Sharing Service for Microsoft Networks" and the "Client for Microsoft Networks" check boxes from the list of used items and click "OK."
14) Now we return to Available Connections again. We click on the VPN connection, enter the username / password.
15) We use it!
(C) Lesley
 Original message
Настраиваем VPN. Windows
Оговорюсь сразу - VPN-сервисы, как правило, платные. Вы платите или за используемый трафик, или за время использования (день, неделя, месяц, год) сервиса.
Ниже я приведу список проверенных серверов, которые точно не хранят информацию о Вас, находятся не на территории РФ и принимают оплату в биткоинах.
1. Prices for anonymous VPN at Proxy.sh цена от 2 долларов в месяц
2. Trusted Security Privacy and Anonymity Service Provider | BolehVPN - 10 долларов в месяц
3. IPredator - VPN - 8 долларов в месяц
4. NordVPN: Best VPN Service Provider | #1 Editors' Choice - 10 долларов в месяц
5. Mullvad - 8 долларов в месяц
6. VPN Pricing - PPTP, SSTP, L2TP and OpenVPN Access : EarthVPN - 4 доллара в месяц
7. AirVPN - The air to breathe the real Internet - 10 долларов в месяц
8. blackVPN – Get The Premium VPN Service - 12 долларов в месяц
За пример возьмем настройку VPN от NordVPN.
Windows
Использование готового клиента от поставщика VPN услуг.
1) Скачиваем клиент по ссылке: Download VPN Client: Simple to Set Up & Easy to Use Software! | NordVPN
2) Открываем скаченный файл.
3) Подтверждаем внесение изменений программой
4) Устанавливаем.
5) Пользуемся.
Настройка VPN через OpenVPN:
1) Скачиваем клиент OpenVPN GUI с официального сайта разбротчика: https://swupdate.openvpn.org/community/releases/openvpn-install-2.4.0-I602.exe
2) Устанавливаем скаченный файл.
Следуйте инструкции установщика.
3) После того как вы установили программу, вам нужно скачать файлы конфигурации серверов вашего VPN провайдера (их можно найти на сайте вашего VPN провайдера), в данном примере мы используем NordVPN.
4) Скаченный файл будет ZIP-архивом, содержащий множество конфигураций - каждая из которых, содержит информацию о том как подключатся к одному из серверов вашего VPN провайдера, а также протокол соединения TCP/UDP. Я рекомендую пользоваться протоколом TCP, хоть он работает медленнее чем UDP, но гарантирует доставку пакетов данных в неизменном виде, последовательности и без потерь.
5) Теперь необходимо извлечь конфигурации, которые вы будете использовать в папку: C:/Program Files/OpenVPN/config/
Приложение OpenVPN GUI поддерживает только до 50 конфигурационных файлов, присутствующих в папке / config /. Поскольку каждый файл представляет собой сервер, вам необходимо заранее знать, к каким серверам вы хотите подключиться. По завершении установки вы можете легко переключаться между серверами, которые вы скопировали.
5.1) Откройте ZIP-архив с конфигурациями серверов, который вы скачаете с сайта вашего VPN провайдера, затем откройте C:/Program Files/OpenVPN/config/
5.2) Теперь скопируйте и вставьте файлы.
Нажмите продолжить.
6) Теперь, когда файлы конфигурации загружены в соответствующую папку, давайте откроем приложение OpenVPN GUI.
7) Разрешите вносить программе изменения - это важно для VPN соединения.
8) Значок с программой будет отображаться в правом нижнем углу.
9) Правой кнопкой мыши щелкаем на иконку программы, выбираем один из серверов, жмем подключиться.
10) Введите ваши логин/пароль, которые вы создали при регистрации у вашего VPN провайдера. Нажмите ОК.
11) Ваше VPN соединение настроено, вы восхитительны!
Настройка VPN через L2TP/IPSec:
Windows 10
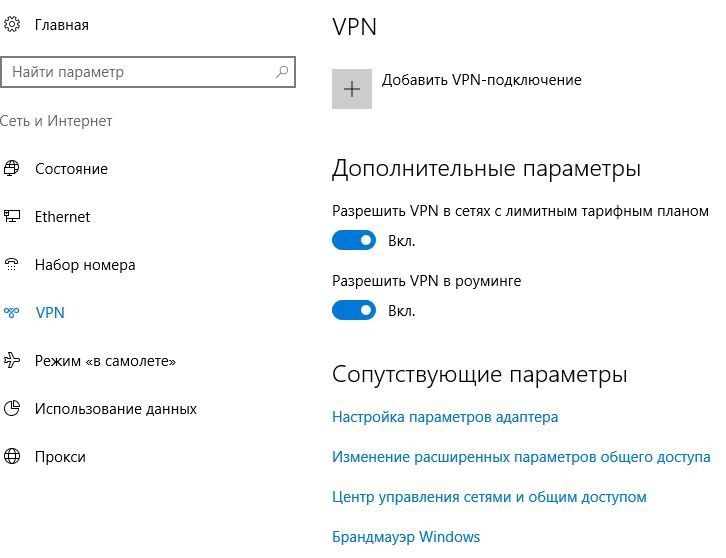
1) Проделываем такой путь: Параметры > Сеть и Интернет > VPN и нажимаем "Добавить VPN-подключение".
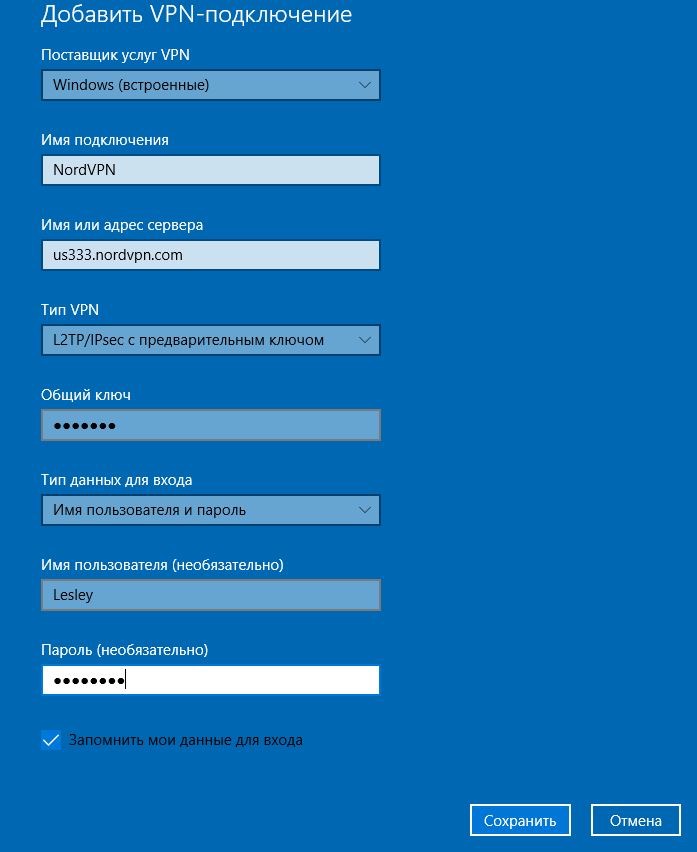
2) В открытом окне вы увидите следующее (см. изображение):
Поставщик услуг VPN: выбираем Windows (встроенные)
Имя подключения: пишите какое вам больше всего нравится
Имя или адрес сервера: в зависимости от поставщика VPN(в нашем примере, us333.nordvpn.com
Тип VPN: L2TP/IPSec с предварительным ключом
Общий ключ: зависит от вашего поставщика VPN услуг, в данном примере nordvpn
Тип данных для входа: Имя пользователя и пароль
Имя пользователя: Ваше имя пользователя, который вы использовали для регистрации у поставщика VPN услуг, в данном примере NordVPN
Пароль: Соответственно пароль, который вы использовали при регистрации
3) Нажимаем на только что созданное VPN подключение, затем на "Подключиться" и вы восхительны!
Windows 7/8
1) Открываем Центр управления сетями и общим доступом.
2) Кликаем на Создание и настройка нового подключения или сети.
3) Затем кликаем на Подключение к рабочему месту.
4) Кликаем на Использовать мое подключение к Интернету VPN.
5) В поле Адрес в Интернете вводите IP-адрес сервера вашего VPN-провайдера (список IP-адресов вы можете найти на сайте вашего VPN-провайдера). В поле Имя объекта назначения пишите название вашего VPN соединения. Нажимаем Далее. Вводим логин/пароль, который вы создали при регистрации у вашего VPN-провайдера.
6) Далее в правом нижнем углу кликаем на Доступные подключения.
7) Кликаем правой кнопкой мыши на иконку VPN соединения, выбираем Свойства.
8) Убедитесь, что домен входа в Windows не включен. Попытки повторного набора должны быть установлены на очень большое число. Нажмите Параметры PPP.
9)Внутри параметров PPP важно включить LCP-расширения и отключить сжатие программного обеспечения.
10) Переходим во вкладку Безопасность. Выбираем тип VPN: L2TP IPSec VPN.
11) Нажимаем Дополнительные параметры.
12) Выбираем Для проверки подлинности использовать предварительный ключ. Вводим ключ вашего VPN-провайдера.
13) Переходим во вкладку Сеть. Снимите флажок IPv6 из списка доступных сетевых протоколов. Также снимите флажок «Служба доступа к файлам и принтерам для сетей Microsoft», а также «Клиент для сетей Microsoft» из списка используемых элементов и нажмите «ОК».
14) Теперь снова возвращаемся в Доступные подключения. Кликаем на VPN соединение, вводим логин/пароль.
15) Пользуемся!
(C)Lesley
Оговорюсь сразу - VPN-сервисы, как правило, платные. Вы платите или за используемый трафик, или за время использования (день, неделя, месяц, год) сервиса.
Ниже я приведу список проверенных серверов, которые точно не хранят информацию о Вас, находятся не на территории РФ и принимают оплату в биткоинах.
1. Prices for anonymous VPN at Proxy.sh цена от 2 долларов в месяц
2. Trusted Security Privacy and Anonymity Service Provider | BolehVPN - 10 долларов в месяц
3. IPredator - VPN - 8 долларов в месяц
4. NordVPN: Best VPN Service Provider | #1 Editors' Choice - 10 долларов в месяц
5. Mullvad - 8 долларов в месяц
6. VPN Pricing - PPTP, SSTP, L2TP and OpenVPN Access : EarthVPN - 4 доллара в месяц
7. AirVPN - The air to breathe the real Internet - 10 долларов в месяц
8. blackVPN – Get The Premium VPN Service - 12 долларов в месяц
За пример возьмем настройку VPN от NordVPN.
Windows
Использование готового клиента от поставщика VPN услуг.
1) Скачиваем клиент по ссылке: Download VPN Client: Simple to Set Up & Easy to Use Software! | NordVPN
2) Открываем скаченный файл.
3) Подтверждаем внесение изменений программой
4) Устанавливаем.
5) Пользуемся.
Настройка VPN через OpenVPN:
1) Скачиваем клиент OpenVPN GUI с официального сайта разбротчика: https://swupdate.openvpn.org/community/releases/openvpn-install-2.4.0-I602.exe
2) Устанавливаем скаченный файл.
Следуйте инструкции установщика.
3) После того как вы установили программу, вам нужно скачать файлы конфигурации серверов вашего VPN провайдера (их можно найти на сайте вашего VPN провайдера), в данном примере мы используем NordVPN.
4) Скаченный файл будет ZIP-архивом, содержащий множество конфигураций - каждая из которых, содержит информацию о том как подключатся к одному из серверов вашего VPN провайдера, а также протокол соединения TCP/UDP. Я рекомендую пользоваться протоколом TCP, хоть он работает медленнее чем UDP, но гарантирует доставку пакетов данных в неизменном виде, последовательности и без потерь.
5) Теперь необходимо извлечь конфигурации, которые вы будете использовать в папку: C:/Program Files/OpenVPN/config/
Приложение OpenVPN GUI поддерживает только до 50 конфигурационных файлов, присутствующих в папке / config /. Поскольку каждый файл представляет собой сервер, вам необходимо заранее знать, к каким серверам вы хотите подключиться. По завершении установки вы можете легко переключаться между серверами, которые вы скопировали.
5.1) Откройте ZIP-архив с конфигурациями серверов, который вы скачаете с сайта вашего VPN провайдера, затем откройте C:/Program Files/OpenVPN/config/
5.2) Теперь скопируйте и вставьте файлы.
Нажмите продолжить.
6) Теперь, когда файлы конфигурации загружены в соответствующую папку, давайте откроем приложение OpenVPN GUI.
7) Разрешите вносить программе изменения - это важно для VPN соединения.
8) Значок с программой будет отображаться в правом нижнем углу.
9) Правой кнопкой мыши щелкаем на иконку программы, выбираем один из серверов, жмем подключиться.
10) Введите ваши логин/пароль, которые вы создали при регистрации у вашего VPN провайдера. Нажмите ОК.
11) Ваше VPN соединение настроено, вы восхитительны!
Настройка VPN через L2TP/IPSec:
Windows 10
1) Проделываем такой путь: Параметры > Сеть и Интернет > VPN и нажимаем "Добавить VPN-подключение".
2) В открытом окне вы увидите следующее (см. изображение):
Поставщик услуг VPN: выбираем Windows (встроенные)
Имя подключения: пишите какое вам больше всего нравится
Имя или адрес сервера: в зависимости от поставщика VPN(в нашем примере, us333.nordvpn.com
Тип VPN: L2TP/IPSec с предварительным ключом
Общий ключ: зависит от вашего поставщика VPN услуг, в данном примере nordvpn
Тип данных для входа: Имя пользователя и пароль
Имя пользователя: Ваше имя пользователя, который вы использовали для регистрации у поставщика VPN услуг, в данном примере NordVPN
Пароль: Соответственно пароль, который вы использовали при регистрации
3) Нажимаем на только что созданное VPN подключение, затем на "Подключиться" и вы восхительны!
Windows 7/8
1) Открываем Центр управления сетями и общим доступом.
2) Кликаем на Создание и настройка нового подключения или сети.
3) Затем кликаем на Подключение к рабочему месту.
4) Кликаем на Использовать мое подключение к Интернету VPN.
5) В поле Адрес в Интернете вводите IP-адрес сервера вашего VPN-провайдера (список IP-адресов вы можете найти на сайте вашего VPN-провайдера). В поле Имя объекта назначения пишите название вашего VPN соединения. Нажимаем Далее. Вводим логин/пароль, который вы создали при регистрации у вашего VPN-провайдера.
6) Далее в правом нижнем углу кликаем на Доступные подключения.
7) Кликаем правой кнопкой мыши на иконку VPN соединения, выбираем Свойства.
8) Убедитесь, что домен входа в Windows не включен. Попытки повторного набора должны быть установлены на очень большое число. Нажмите Параметры PPP.
9)Внутри параметров PPP важно включить LCP-расширения и отключить сжатие программного обеспечения.
10) Переходим во вкладку Безопасность. Выбираем тип VPN: L2TP IPSec VPN.
11) Нажимаем Дополнительные параметры.
12) Выбираем Для проверки подлинности использовать предварительный ключ. Вводим ключ вашего VPN-провайдера.
13) Переходим во вкладку Сеть. Снимите флажок IPv6 из списка доступных сетевых протоколов. Также снимите флажок «Служба доступа к файлам и принтерам для сетей Microsoft», а также «Клиент для сетей Microsoft» из списка используемых элементов и нажмите «ОК».
14) Теперь снова возвращаемся в Доступные подключения. Кликаем на VPN соединение, вводим логин/пароль.
15) Пользуемся!
(C)Lesley
